How to Clean Your Windscreen
There are three options to tweak the dirt to your liking, depending on what you want to achieve:
- To just get rid of the dirt completely, use CSP’s WindscreenFX feature
- If you just want reduce the amount of glare created by the dirt you can use a CSP car config file to tweak the shader properities
- If the dirt texture is too low-res, or has a dashboard reflection that looks bad in VR, you can replace it using a CSP car config file
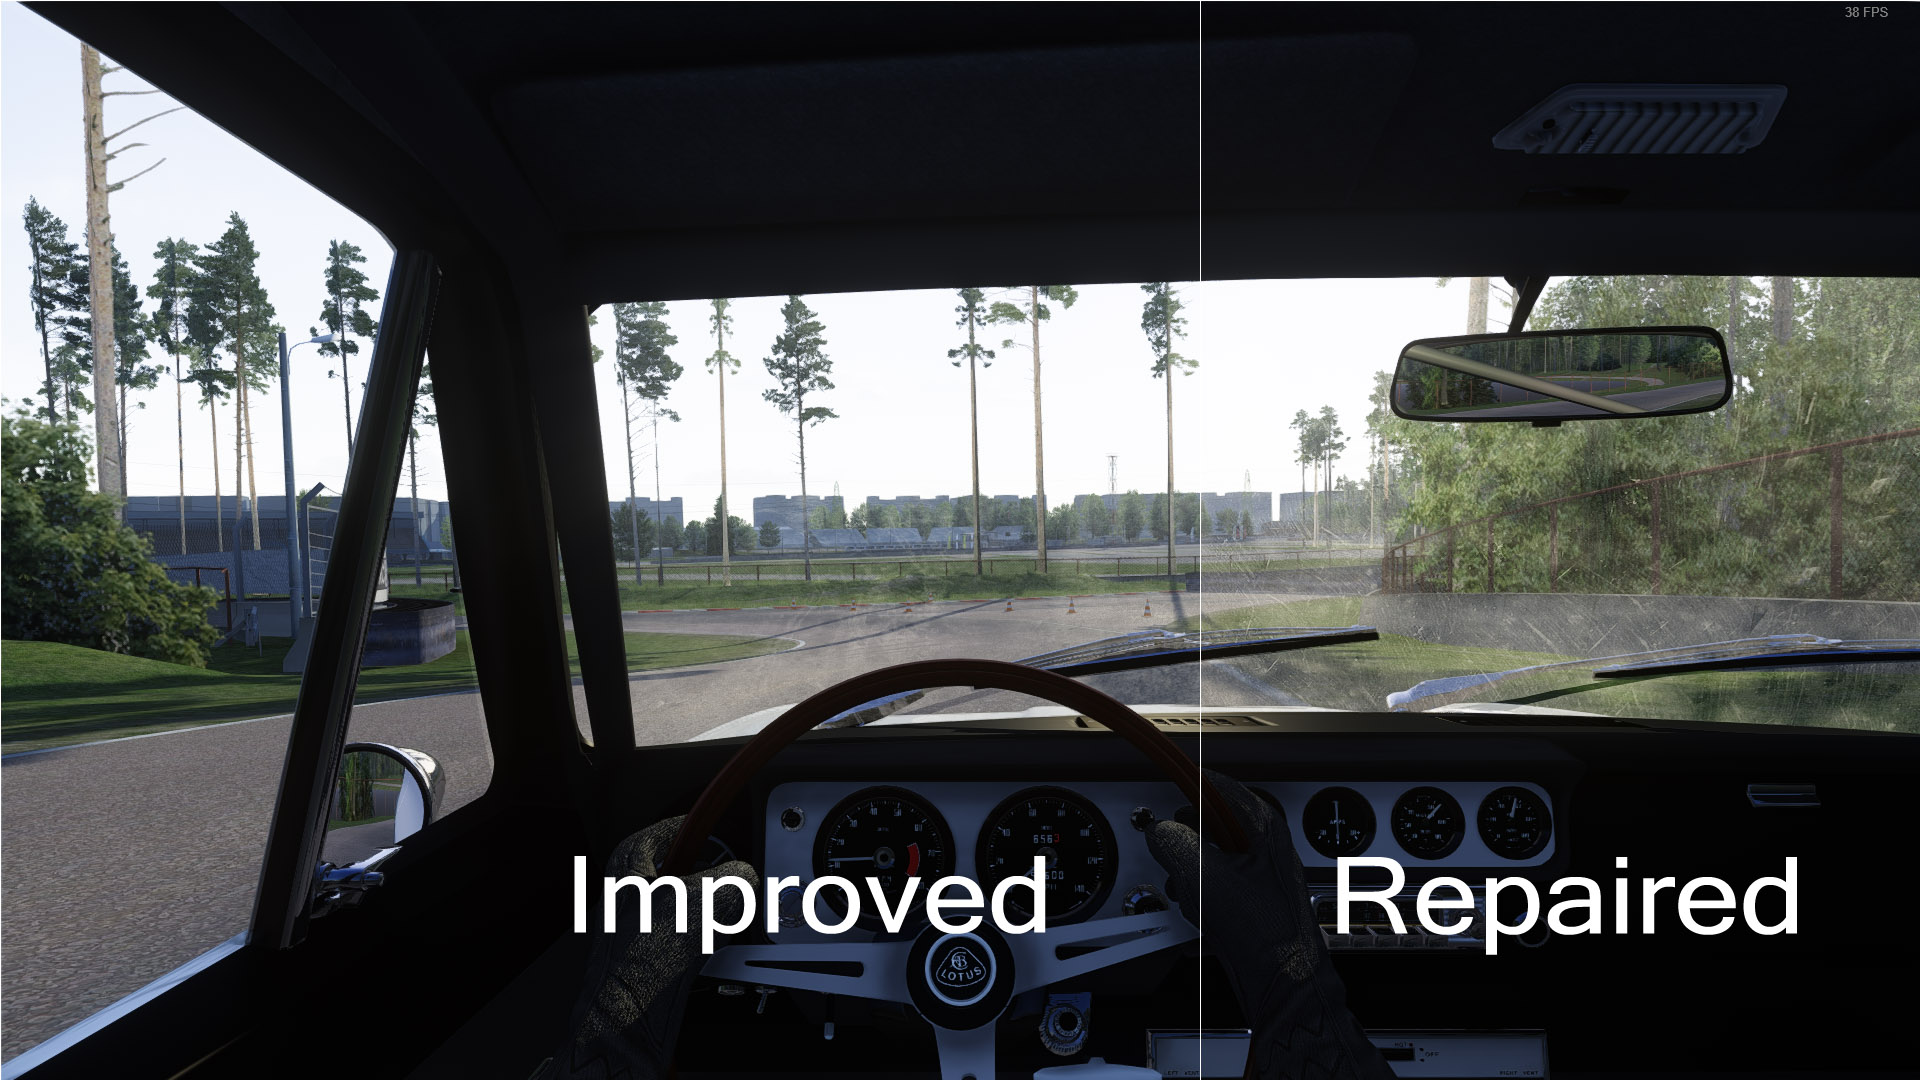
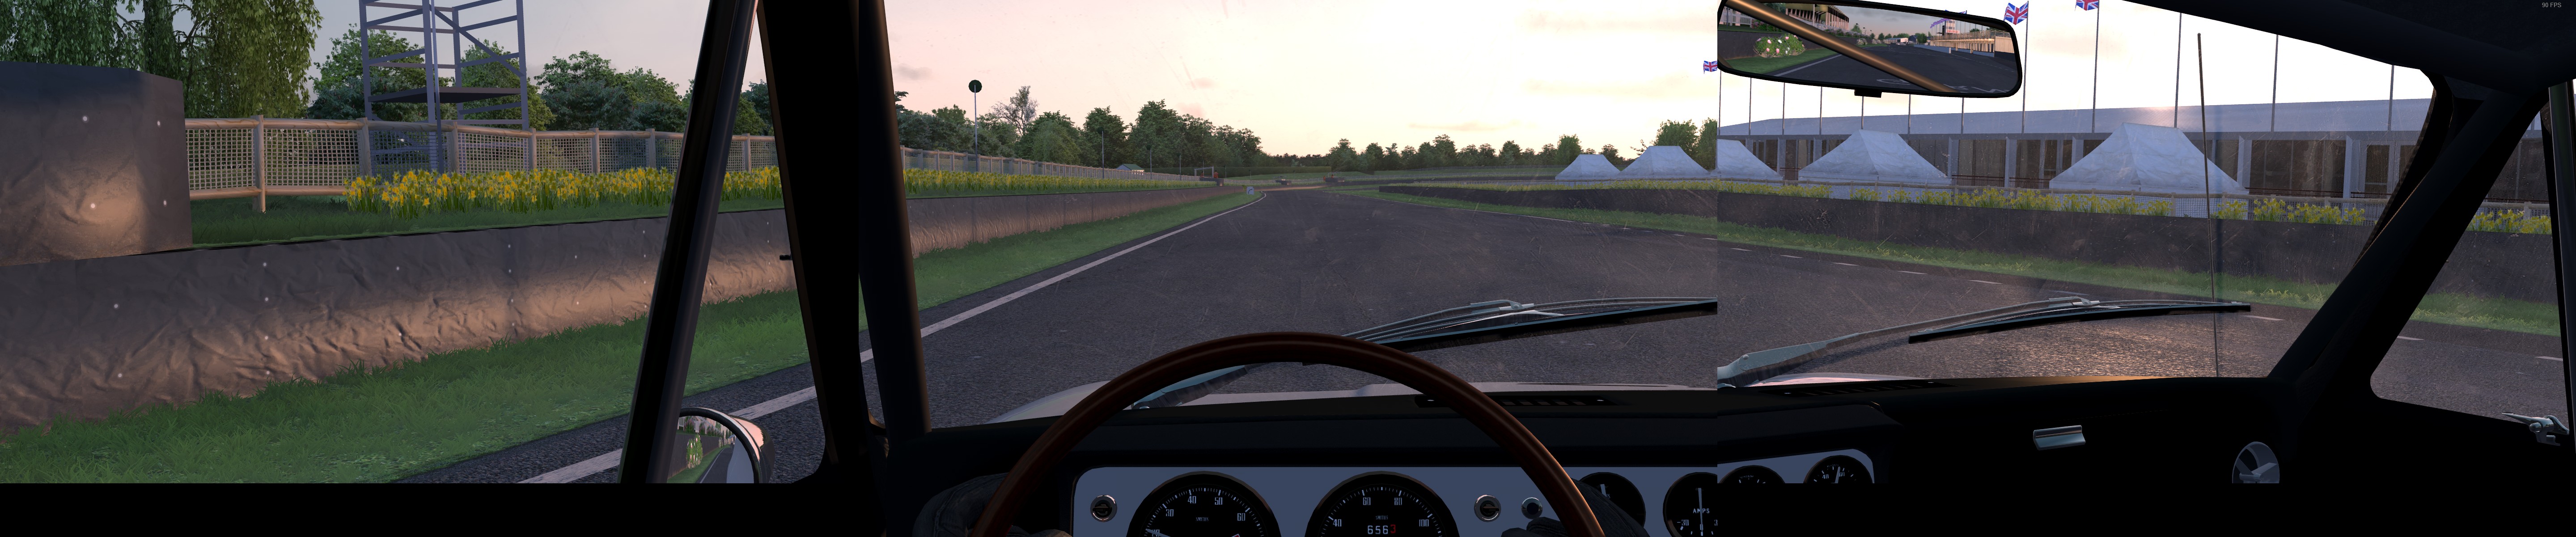
Each of these options should work equally well for any car, but we’ll use the Lotus Cortina from the Touring Car Legends mod for the examples. Let’s see how it looks by default:

COmpletely Clean
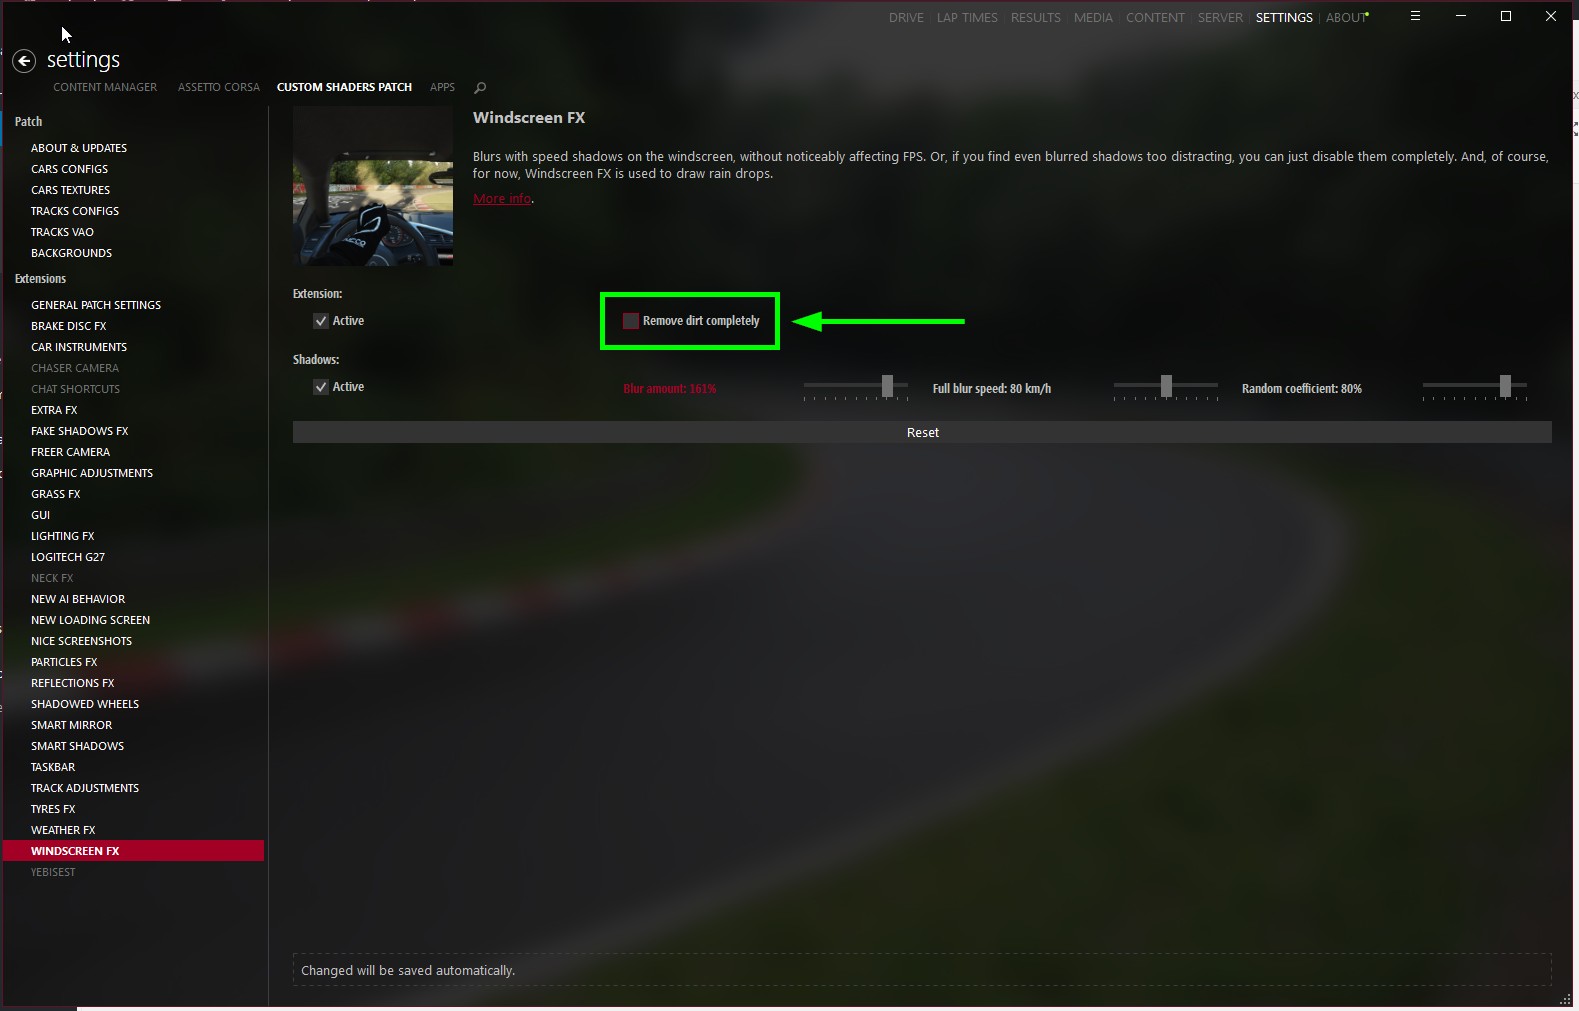
If you can’t understand why anyone would let a race car out with a dirty windscreen at all, and want a perfectly clear screen, the best option is to use CSP to remove the dirt texture entirely. This can be done by enabling WindscreenFX in Content Manager -> Settings -> Custom Shaders Patch, and ensuring that the “Remove Dirt Completely” option is ticked.
If this doesn’t seem to have any effect in game, see this guide on how to fix buggy windscreens on mod cars, as several cars (including the TCL Lotus Cortina) have incorrectly configured windscreens, which prevents WindscreenFX from working.
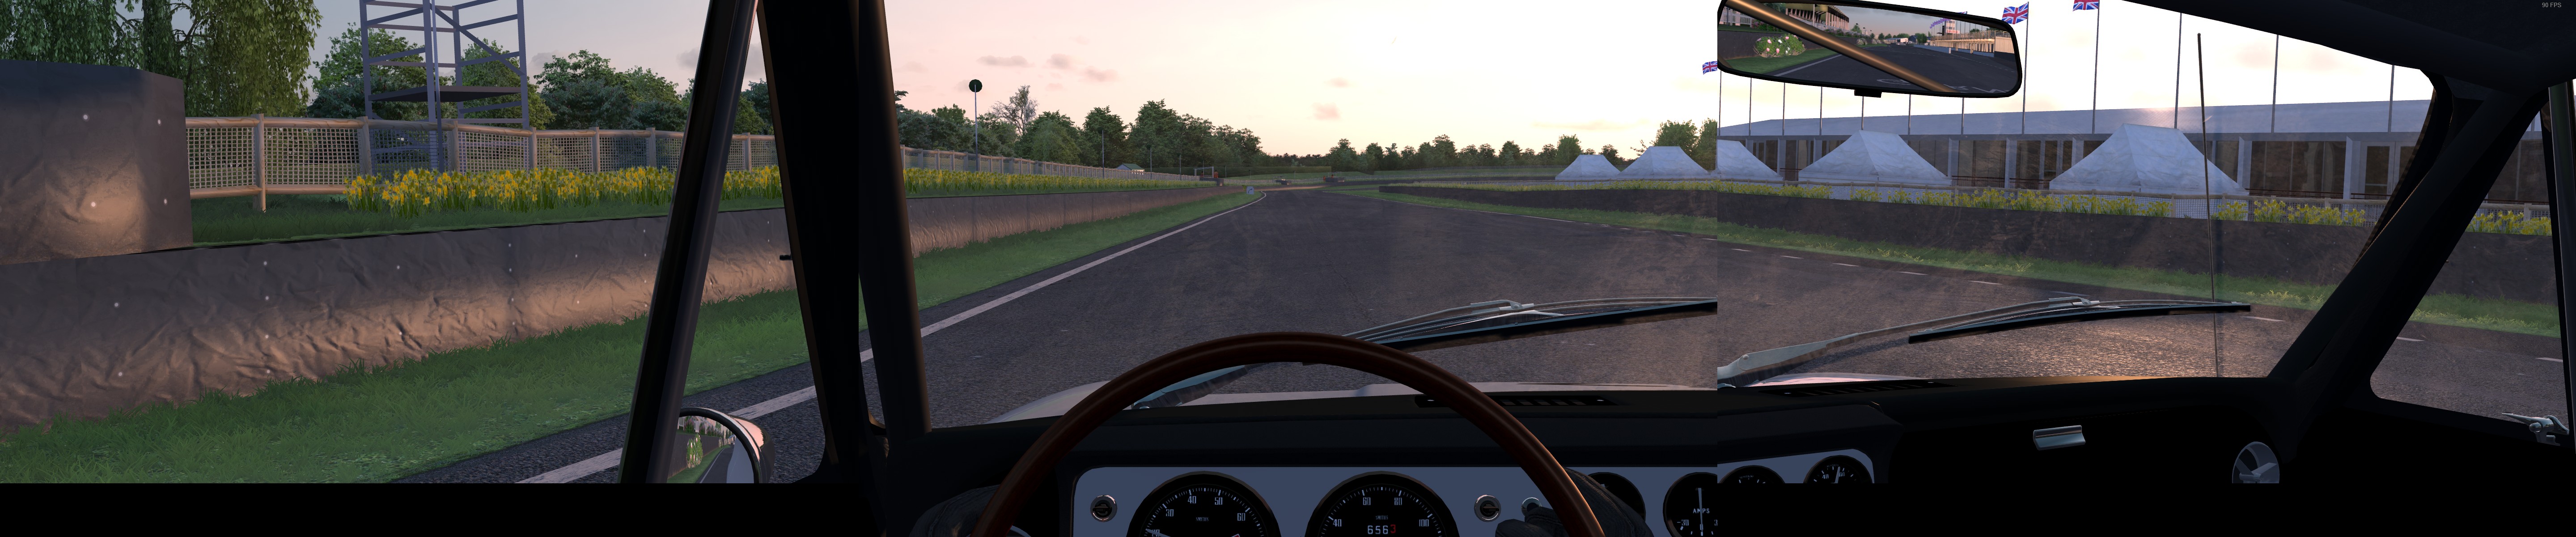
I Want It Dirty, But Not That Dirty
But a perfectly clean windscreen is almost as unrealistic as one cover in dirt. We can use CSP a extended car config to keep the dirt, but reduce the amount of glare it creates, so that we’re not completely blinded by it.
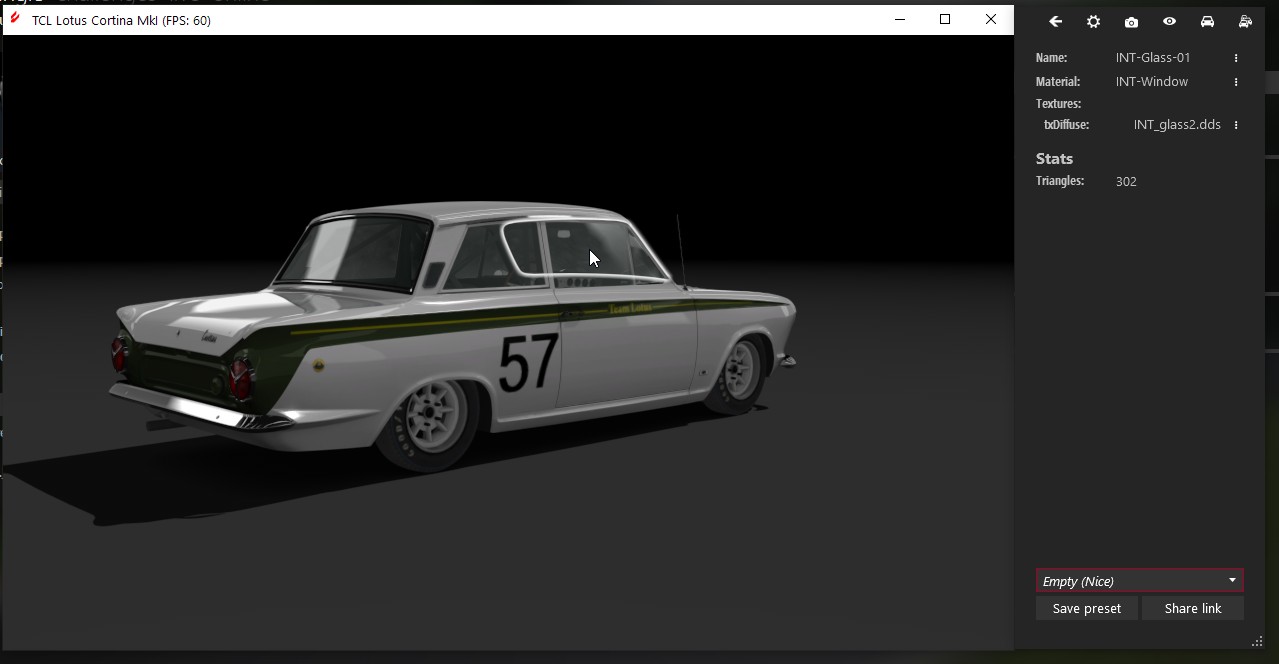
Open the car in the Content Manager Showroom and click through until the inside of the windscreen is selected
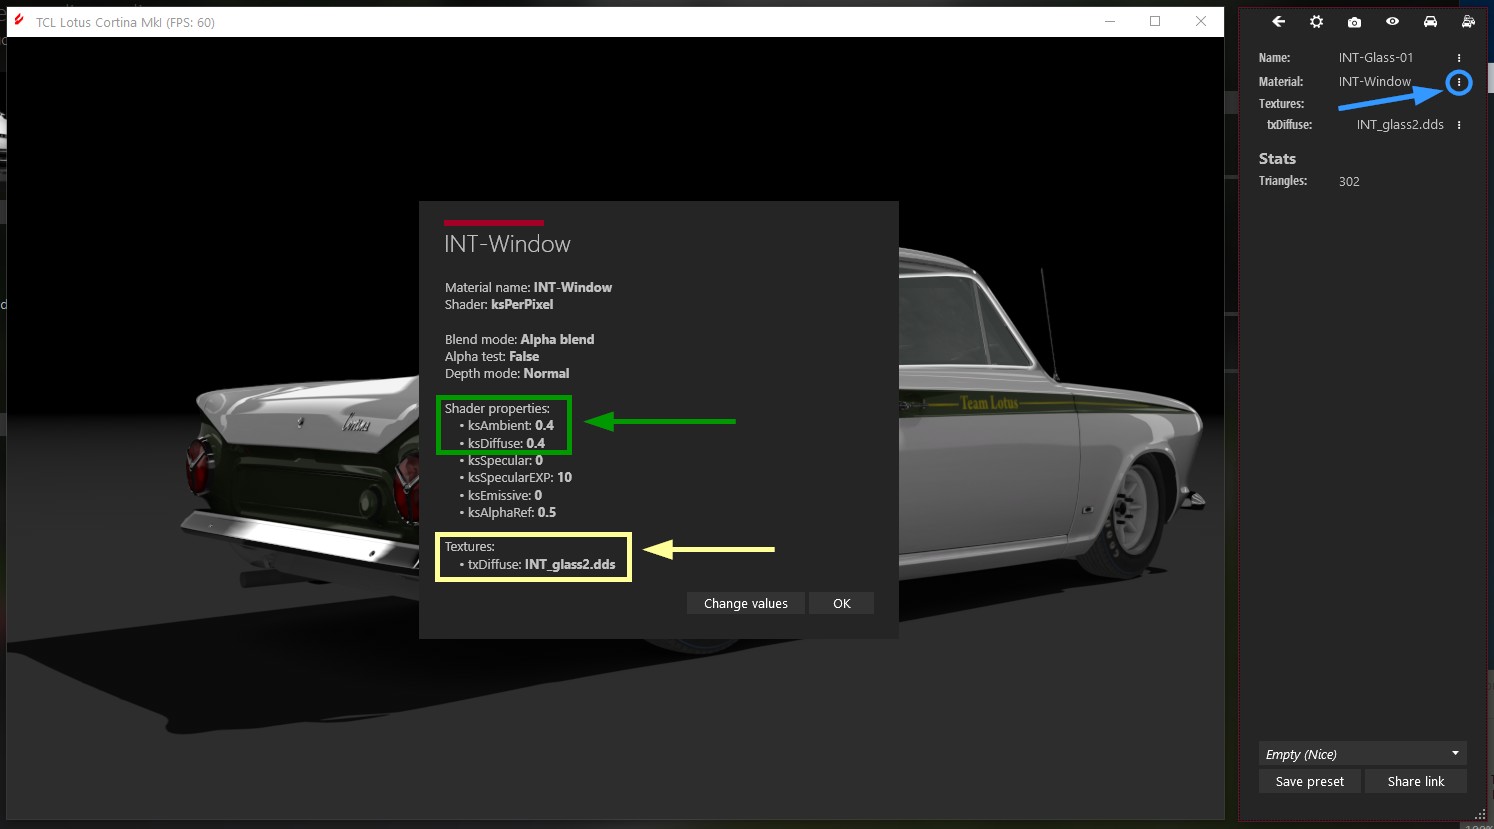
Then click on the three dots next to where it says “Material” on the control palette (circled blue) to open the Material Properties window
It might take a few clicks to correctly select the inside of the windscreen, as Content Manager will cycle through the various meshes under the pointer.
Here we can see that the name of the material assigned to the inside of the windscreen is INT-Window, and the Properties (highlighted green) of the shader that is being applied. The ones we are most interested in are ksAmbient and ksDiffuse, as by changing these we can control how visible the dirt texture is.
If you’ve followed the previous guide on how to fix the reflections on the Cortina Windscreen, you should have a file called tc_legends_cortina.ini in your \Documents\Assetto Corsa\cfg\extension\cars folder. If you haven’t, or if you’re working with a different car, create a new text file in this location with the name of the car you are working with (which must be the same as the folder name of that car).
Assuming you’re working with the Cortina, and have followed the previous guide, this file should look like this:
[SHADER_REPLACEMENT_100]
MATERIALS = INT-Window
SHADER = ksWindscreen
NOTE: The material name specified here will vary from one car to another. INT-Window is correct for the Cortina, but it will probably be different if dealing with another car. That’s why it’s important to load the car into the CM Showroom, to check for the correct material name.
Now, add two additional lines that match the Shader Properties we just found from Content Manager, so that the file looks like this:
[SHADER_REPLACEMENT_100]
MATERIALS = INT-Window
SHADER = ksWindscreen
PROP_0=ksAmbient, 0.40
PROP_1=ksDiffuse, 0.40
At this point, it’s a good idea to load the game up and check that nothing has changed, before continuing.
Now we can edit the values for ksAmbient and ksDiffuse to change the appearance of the dirt, both these values should be between zero and one. Very roughly, ksAmbient controls the how color of the light source is reflected (higher values appear whiter); and ksDiffuse controls the intensity of the light reflected. In this case let’s reduce ksDiffuse from 0.4 to 0.2, by editing the file to look like this:
[SHADER_REPLACEMENT_100]
MATERIALS = INT-Window
SHADER = ksWindscreen
PROP_0=ksAmbient, 0.40
PROP_1=ksDiffuse, 0.20
Save it, and on loading the game, we can see the amount of light reflected back at us by the dirt is much reduce compared to before:
You can play around with these properties until you find a combination you like. By editing the file and save it, while the game is running, you will see the effects straight away without having to close and restart the game.
Upgrading to High-Res Dirt
Tweaking the shader properties can only get us so far. The default dirt textures can look a bit low-res on triple-screen set-ups, and I’m told that those that incorporate a reflection of the dashboard don’t work well in VR. Replacing the dirt texture lets us solve both of these problems.
We could replace the dirt texture simply by including the new texture file in a skin, but that would require creating a skin for every car we want to drive and wouldn’t work well online where we might not be able to use a custom skin; it would also mean having lot’s of copies of the same texture.
First of all, we need to find or create a new texture to use for the dirt. I’d suggest a resolution of 2048×2048 if you find the default (1024×1024) textures a bit blocky. This should be saved as a .dds in the usual way, making sure it has an alpha channel to control the opacity of the dirt. This should then be saved into the \Documents\Assetto Corsa\cfg\extension\cars folder.
If you can’t be bothered creating your own texture, you can use this one that I’ve created: dirty-glass1-2k , just unpack it into the \Documents\Assetto Corsa\cfg\extension\cars folder.
Now that we have the texture we want, we need to tell CSP to use to replace the default one. Open or create the \Documents\Assetto Corsa\cfg\extension\cars \tc_legends_cortina.ini file, and edit it so that it looks like this (assuming you’re using my dirt texture):
[SHADER_REPLACEMENT_100]
MATERIALS = INT-Window
SHADER = ksWindscreen
;PROP_0=ksAmbient, 0.40
;PROP_1=ksDiffuse, 0.20
RESOURCE_0 = txDiffuse
RESOURCE_FILE_0 = dirty-glass1-2k.dds
This is telling CSP that the resource named txDiffuse should point to our new texture file, instead of the original INT_glass2.dds file (as highlighted in yellow, above). The semi-colons at the beginning of the two PROP_ lines tell CSP to ignore those lines, and not apply their changes. We can always uncomment these later, if we want to tweak the shader properties even with our new texture.
Save the file, and start up Assetto Corsa, and you should now see your new texture being used for the dirt:
Job Done!
This texture replacement method can also be used to change any other car texture, but in most other cases it makes more sense to do this using a skin.
BG says:
thanks for the high rez texture. Is there a way to replace all cars with this highrez texture without having to replace countless .ini files?
Tarvos21 says:
salut, je te remercie bcp pour ce tuto cela m’aide énormément pour enfin faire des courses même a 12H car hélas certaine voitures je n’avais pas le choix que de rouler sous nuage ou la nuit
Ali says:
I loved this article, I would like to see new guides
OlegB says:
Thanks a lot!
Your tip helped a lot!
jean marc says:
Hi, thanks for all you share and for sidekick extend version !